Ticketing > Purchase Tickets with a Guest Account
Purchase Tickets as a Guest
You may now purchase some items without creating a user account such as a ticket event.
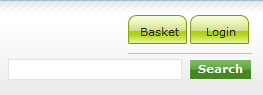
Proceed to the Home Page URL that was provided by your school. At the top right, click Login as shown below.
At the right side of the screen in the New Customers section, enter your e-mail and re-enter your e-mail address. You must enter your e-mail address or you will not receive an e-mail receipt! You also need to enter First Name and Last Name.
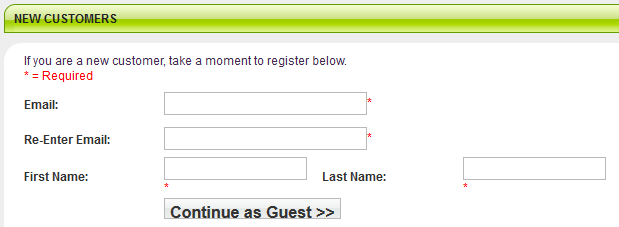
Then Click the Continue as Guest button.
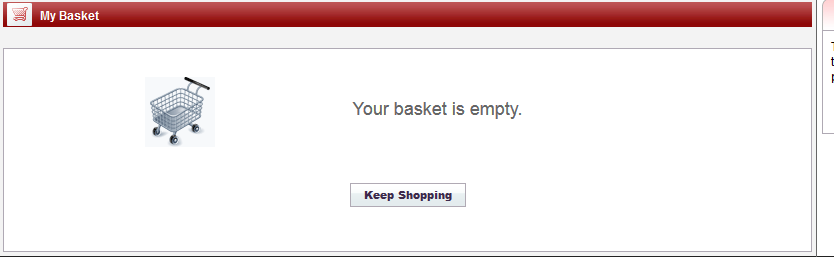
That will bring you to the My Basket Page if you didn't add any items to your cart previously. Click Keep Shopping to locate the ticket item you wish to purchase.
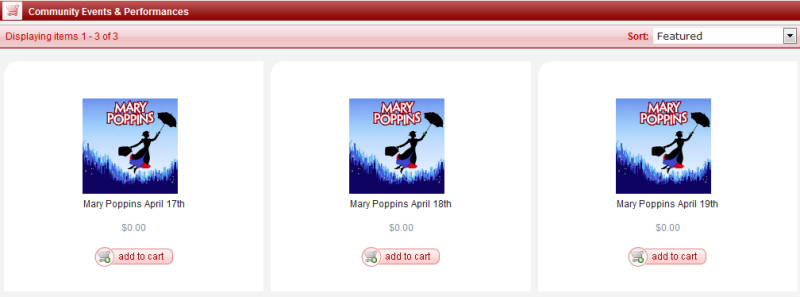
In the example below, I navigated to the Community Events and Performances Category.
Click the section for which you want to purchase tickets to view the seat map for that section.

In the example below, I clicked on the Lower Level section. Find the Row for which you want to purchase tickets.
Mouse-over the seats in the row. You will see the seat number and price appear. Note, the color key.
-
Available Seats are keyed in green.
-
Seats that are in Someone's cart, are temporarily unavailable and are keyed in orange.
-
Seats that have been sold are unavailable and are keyed in red.
-
Areas that are for handicap seating, have no seat but have space for a wheelchair are keyed in blue.
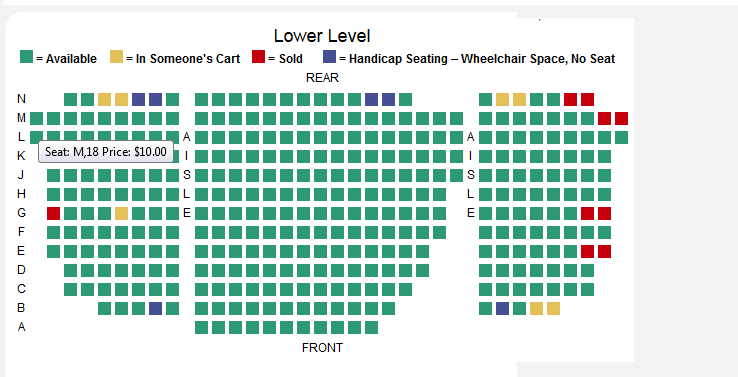
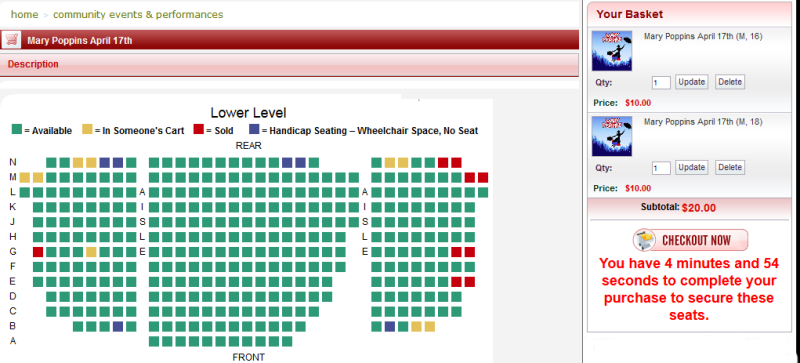
In the example above, I moused over Row M Seat 18. In the example below, I clicked on Seats M16 and M18. That added them to the cart and changed the color to orange for the tickets I clicked. They are in your cart/basket. Note the timer in the basket section.
Click the Checkout Now button to begin your purchase. You will see a screen similar to the one shown below.
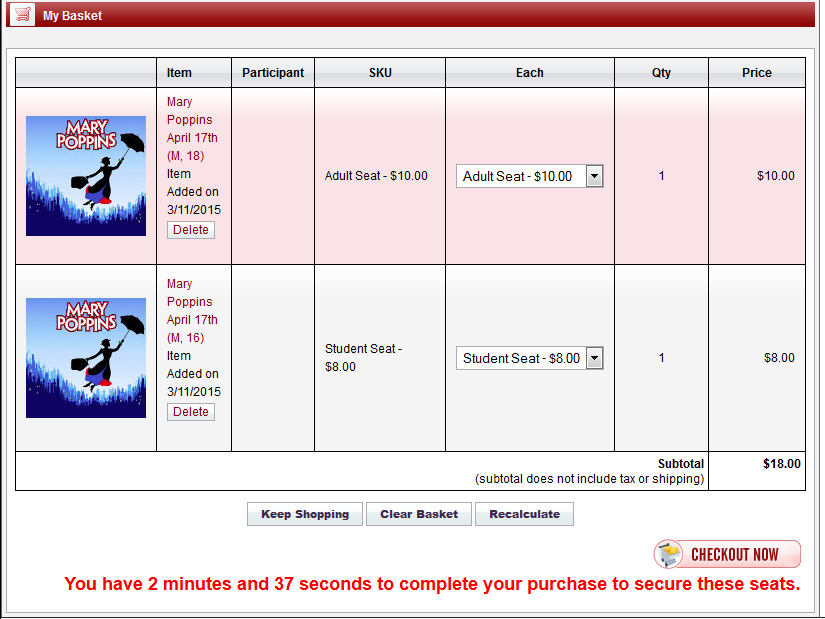
There might be a drop-down where you can choose Student seat pricing (this will vary by performance) In the example above, I chose Student Seat for one of the seats. Click Recalculate to see the price adjustment. Review your seats to ensure they are indeed the seats you wish to purchase.
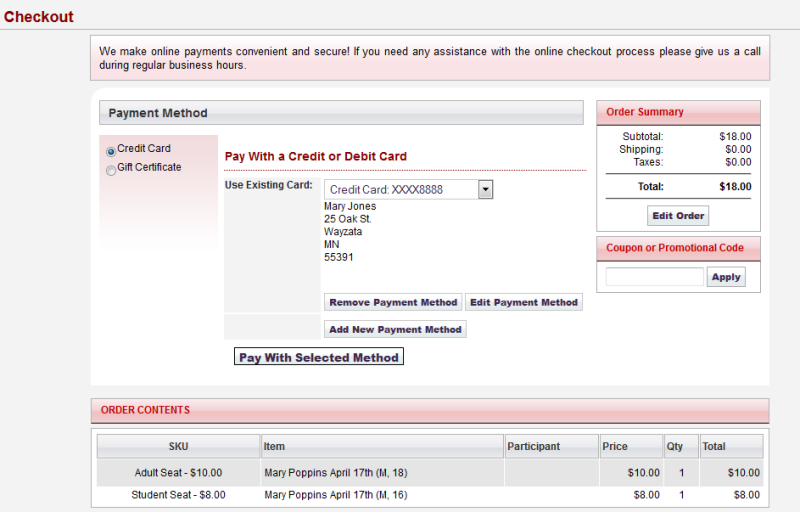
If so, click the Checkout Now button. You will see a page similar to the one below.

Click the Add New Payment Method button to enter payment information. You will see an Authorize.net gateway window as shown below. Your credit card information is never stored in ePayTrak, but directly in Authorize.net for added security. Add your credit card information as shown in the example below. The Company, Country, Phone and Fax fields are not required and you don't need to add any information there.
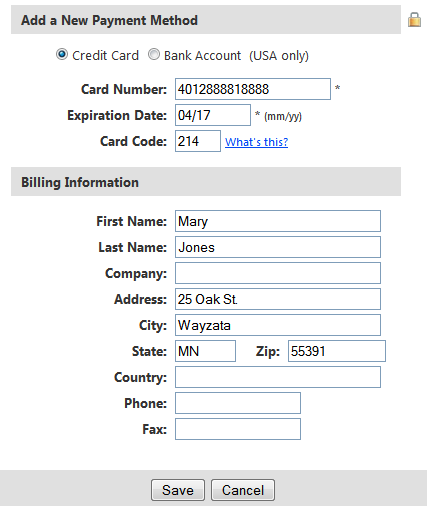
Press Save when complete.
That will bring you back to the Checkout page. The last 4 digits of your credit card will now be visible. Only a 4 digit encrypted token are passed back to ePayTrak!
Click the Pay with Selected Method button to complete your purchase.
You will then see a screen similar to this.
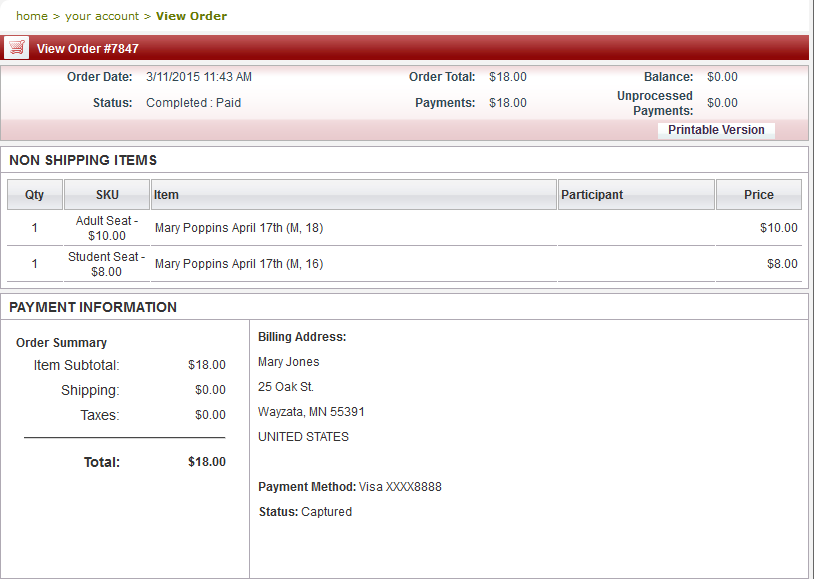
You will receive an e-mail receipt. Bring that receipt for entry into the performance. The bar code on your ticket will be scanned.
related topics:
-
Ticket purchases with an ePayTrak account - Steps to make a ticket purchase with an ePayTrak account.
2018 © Edutrak Software, LLC