Account > Making Wordware Lunch Payments after Creating an ePayTrak Payment Account
Making Lunch Payments in ePayTrak
Now that you have created your ePayTrak food service payment account, you will want to explore your Food Service Settings and payment options.
-
If you have previously created an ePayTrak payment account, login as a returning customer. Enter your e-mail and password at the left in the returning customers section. Then click Sign In.
That will bring you to the Home Page. Navigation is made simple with the Smart Bar.
-
Click the Fork and Knife icon to proceed to the My Food Services Fees & Balances page. (Your school's Smart Bar might be customized and appear somewhat differently.)
You'll see the screen below. Note the Balance.
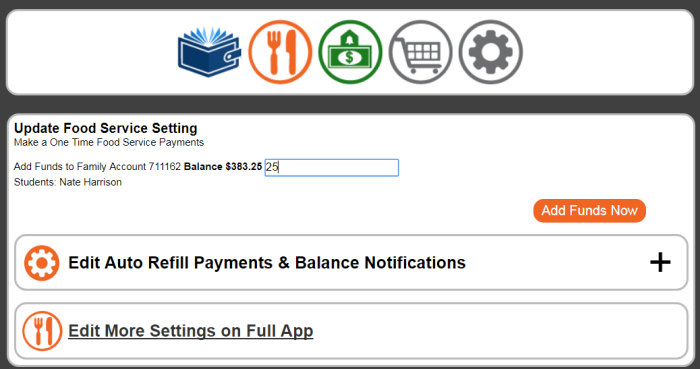
To Make a One Time Food Service Payment
Enter the amount you wish to pay. I entered 25.
-
Click Add Funds Now.
You will land on the My Basket Page.
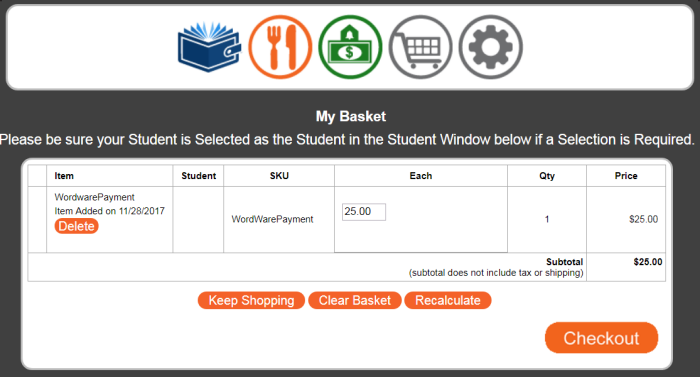
You can change the amount if you wish in the Each box above. In the example above, I left $25 as the amount.
-
Click Checkout.
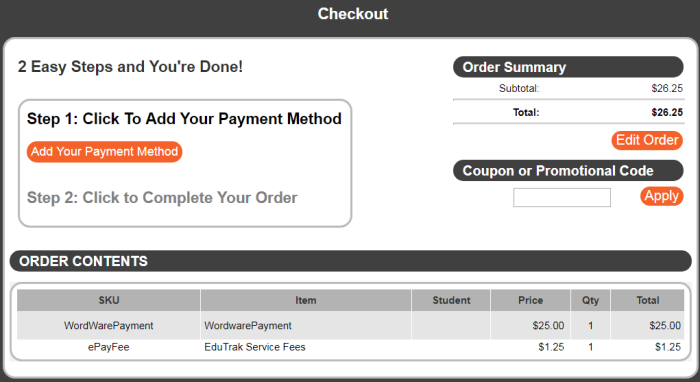
You've arrived at the Checkout Page.
-
Click Add Your Payment Method.
Coupons can be applied on this screen if applicable. Your school might/might not have additional fees added.
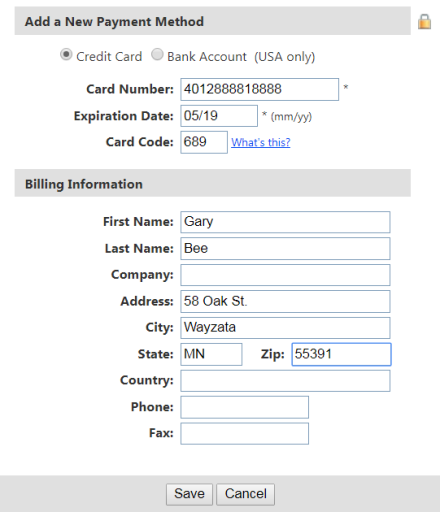
After clicking the Add Your Payment Method button, you see an Authorize.net credit card window. Your credit card information is never entered or stored in ePayTrak for increased security! Authorize.net passes back the last 4 digits of your card as a token. Complete the Card Number, Expiration Date and Card Code fields in the top section.
-
Enter First Name, Last Name, Address, City, State and Zip in the Billing Information fields. The Company, Country, Phone and Fax fields are not required.
-
Press the Save button.
You notice the last four digits of your card is now visible. You can edit or remove this payment method at any time.
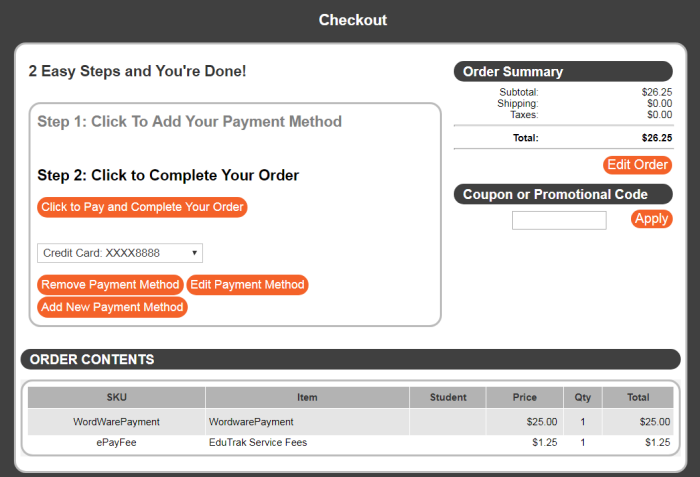
- In Step 2. Click to Pay and Complete Your Order.
You've completed the order. You can print this page by clicking Printable Version. You will receive an e-mail receipt also.
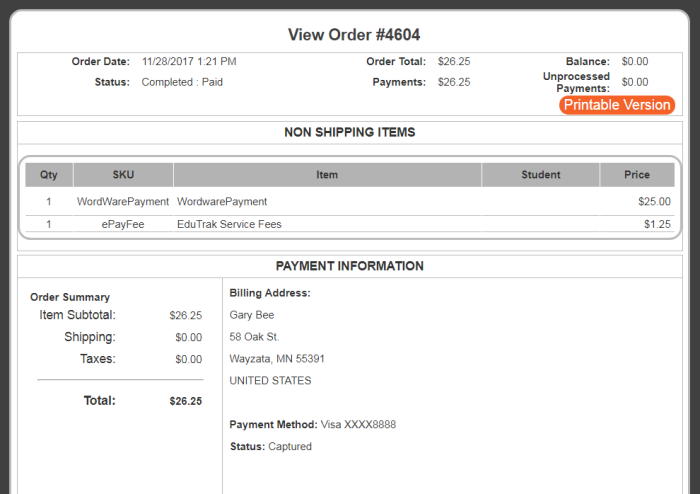
That completes the steps for making a One-Time Payment in ePayTrak.
Automated Payments in ePayTrak
Go to the second section of Edit Auto Refill Payments and Balance Notifications. Click the Plus to expand the section so you will see a window similar to the image below.
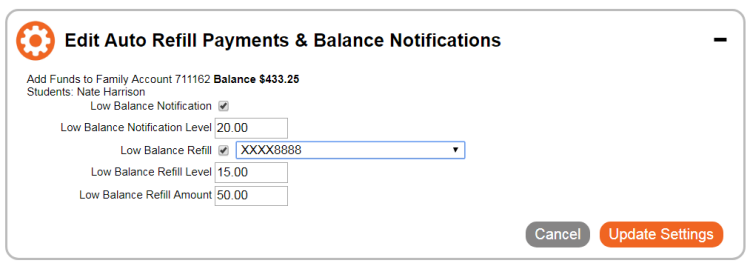
In the example above, I enabled Low Balance Notification by checking it and added a level of $20. You will receive an e-mail notificiation from Wordware directly when your food service balance reaches that level.
If you would like to make a credit card payment to your food service account automatically, check the Low Balance Refill box and select your credit card number in the drop-down box. (If you haven't entered your credit card yet, you can enter your credit card by going to Account > My Saved Payment Methods. Once your card is entered it will appear in the dropdown.)
-
Enter a refill level. In the example above, I added the refill level of $15.00. When your account balance decreases to $15, ePayTrak will automatically make a payment for you!
-
Enter the amount of the payment you wish to make in the Low Balance Refill Amount box.
In the above example, $50 was entered as the refill amount. So, a $50 payment will be made automatically when my account balance reaches the Low Balance Refill Level of $15.
-
Click Update Settings after you’ve made your changes.
The automated payments generally take 24-48 hours to take effect.
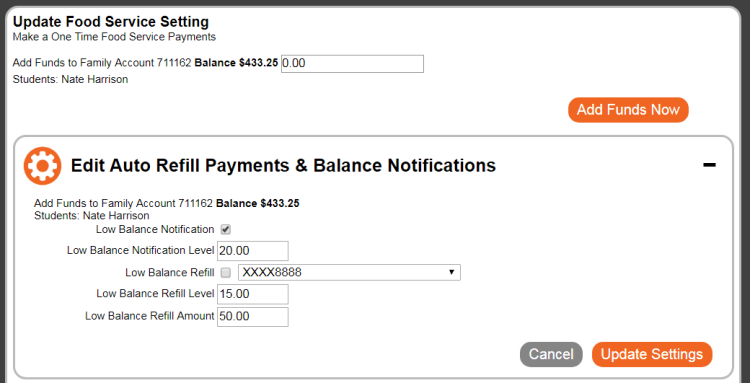
You can still utilize the Low Balance Notification feature and make your payments when you want manually. You don’t have to utilize the automatic payment feature in ePayTrak if you don’t wish. In the below example, I still have the Low Balance Notification in effect, but I unchecked the automatic payment options.
related topics:
-
Wordware Lunch Payments Home - An index to all the Lunch Payment Topics
2018 © Edutrak Software, LLC