e-Mail > Add e-Mail List
Add an e-Mail List
Create E-mail lists.
From the E-mail Lists page, or from the top-menu, go to Marketing > E-mail Lists.
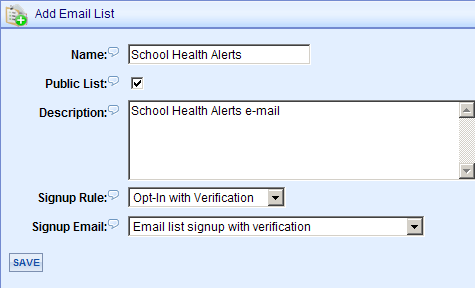
In the right section of the page, you will see the Add E-mail List form.
-
Enter a Name for your list. This will be displayed to users if this is a public list.
-
Uncheck the box if this is a not a Public List. A public list will automatically appear for the customer on the checkout page or My Account page. A private list will only be available through the administration side.
-
If desired, enter a Description for the list. This information will display next to the name of the mailing list when viewed publicly.
-
Select a Signup Rule.
Opt-in with Verification: Requires user to respond to the e-mail list signup using a link within the e-mail that is sent to them. If the user does not respond, they will not be added to the e-mail list. In the example above I used the template for E-Mail list signup with verification.
Opt-in with Confirmation: Will send user an e-mail to let them know they signed up for the e-mail list. The user is immediately added to the e-mail list.
-
Select a Signup E-mail. The signup e-mail is a requirement so the user can acknowledge, or have confirmation, that they have signed up for a mailing list.
There are three stock e-mails that can be used:
Default Signup Message: A simple text e-mail message. This cannot be customized. It can be used with either Signup Rule.
E-mail list signup with verification: An e-mail message that is sent in html or text form. This can be customized. It provides a link that the user must click on to validate their address and be added to the list. It should be used with the signup rule "Opt-in with Verification".
E-mail list signup with notification only: An e-mail message that is sent in html or text form. This can be customized. It provides confirmation to the user that they have signed up for the e-mail list. It should be used with the signup rule "Opt-in with Confirmation".
-
Click the SAVE button when finished.
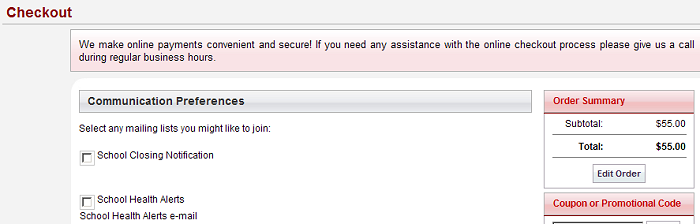
What does the customer see for mailing list options? During the Checkout process, the customer would see the Communications Preference of the public e-mails that have been created. You'll see School Closing Notification and the e-mail we just created, School Health Alerts.
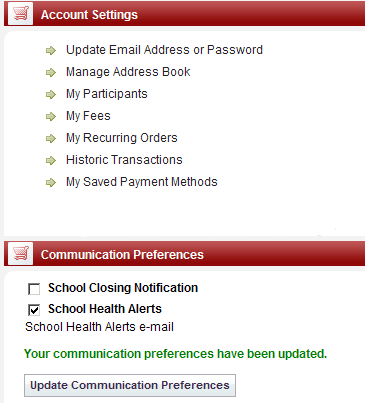
Customers can also manage their communication preferences after creating an account as shown below.
related topics:
-
Manage e-Mail Lists - A guide to managing your e-mail lists.
2019 © Edutrak Software, LLC