Catalog > Product Templates
Creating Product Templates
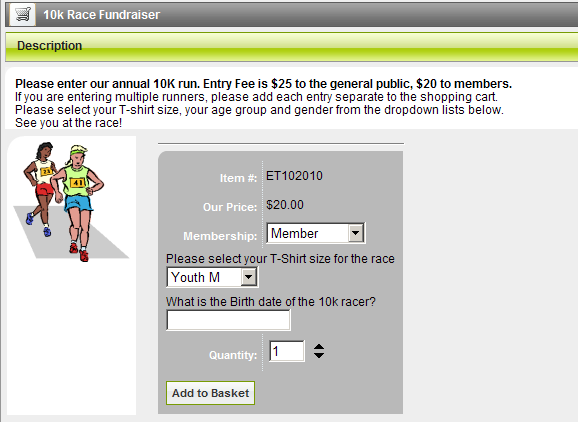
Some products you wish to add to your ePayTrak store might have unique or complex requirements, such as collecting specific information from your customers that can resolved by creating a Product Template. For example, your school is sponsoring a 10k race event for fund raising. You decide you will give a T-shirt to all those who enter the 10k race so you will need to know what T-shirt size the runners wear to determine how many shirts you'll need. You also need their age so you can arrange the winners in age groups. You will first need to create the Product Template and then attach it to your product.
Creating a Product Template
-
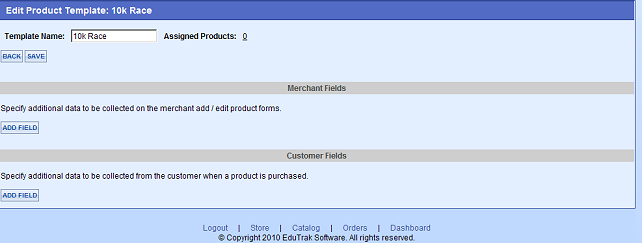
To begin the process, navigate to Catalog > Product Templates. You'll see a similar screen to the one shown below.
-
Enter a name in the Template Name section as shown below. Here I entered 10k Race, then click the 'Add' button.

-
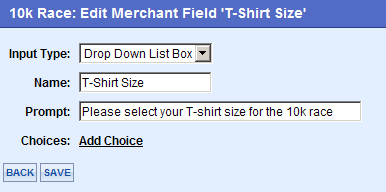
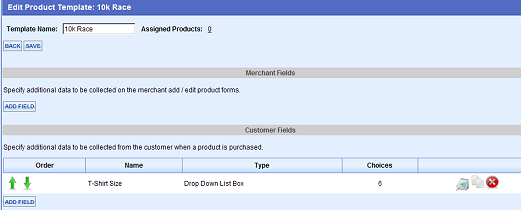
After clicking 'Add', you will see the screen below. You won't often need to add a Merchant Field, but you will want to create Customer Fields to collect information from your customers.
-
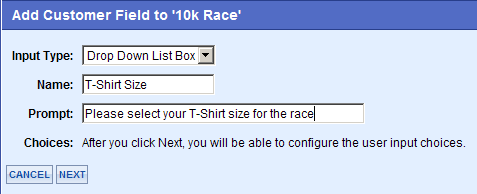
Click 'Add Field' in the Customer Fields section and you will see a screen similar to the one below.
-
Select an Input Type for the drop-down list. For this example, I selected a Drop Down List Box.
-
Enter the name of your field in the Name Box. The Customer doesn't see this field but is used in Forms Reports.
-
Enter the Prompt that your customer will see. Here I entered 'Please select your T-shirt size for the 10k race'.
-
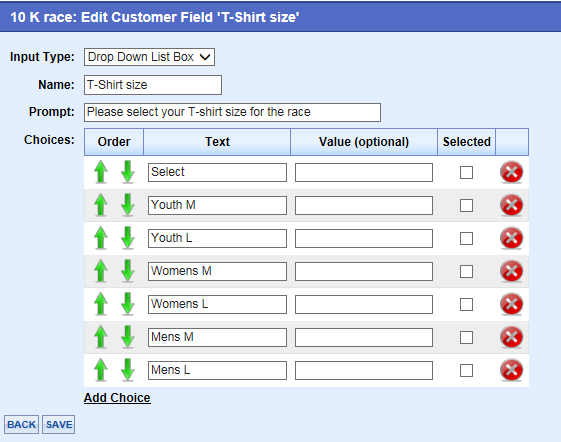
Click 'Next' when finished with these steps. You will see the screen below. You will need to 'Add Choice' for your Drop-Down.
-
Click 'Add Choice', and add your choices as seen below. Click 'Add Choice' to add each entry.
-
You can leave the Value field blank, and 'Selected' you would not normally want to check. Placing a check in the Selected box will then highlight that choice by default to your customer. The Value Field is useful when the text is very long and won't fit on a Forms Report properly.
-
I have added the word Select for the first choice. Explanation below.
-
Click 'Save' when finished. You will see the following screen below.
-
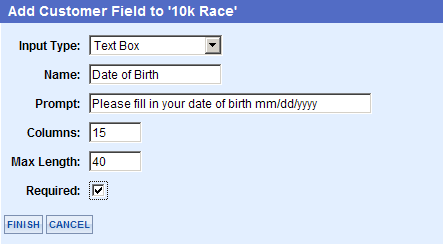
Click 'Add Field' to add a Text Box Field for the Date of Birth for the runner.
Note: Text Area and Text Box are the only fields that are available as required fields in Product Templates at this time!
-
Click 'Finish' when you have completed the field entry.
Tip: You will need to make the column and length long enough for your customer to add all text. The Max Length is how many characters can be entered. Columns governs the display column width in pixels.
-
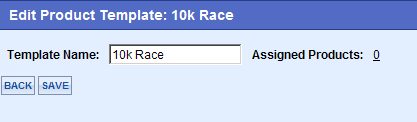
Click 'Save' when finished.
-
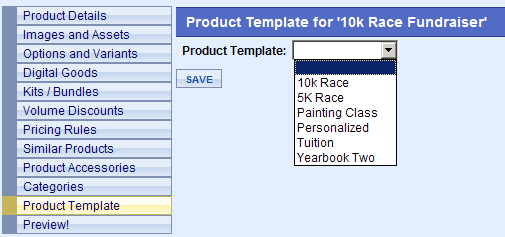
Notice that Assigned Products is set at Zero. The next step is to navigate to Catalog > Browse to open the 10k race product and attach the Product Template we just created to that product. Click Product Template on the left menu.
-
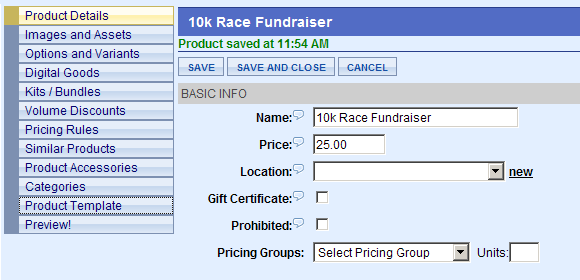
Click 10k Race from the Product Template drop-down as shown below. Then Click 'Save' after selecting the proper Product Template. Then save the Product.
Note: You do NOT want to change a Product Template once it has been used in a transaction. It can possibly create a scenario where you WILL lose data!
What does the Customer see?
By default, the first option appears in a drop-down box. Note Youth M is shown for T shirt size. A nice workaround is adding a choice of 'Select' and making it your first selection. Then you will know if the customer actually selected the first choice or if they didn't choose an entry!
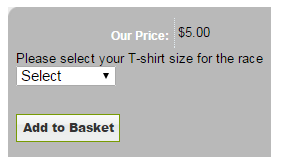
So instead of Youth M as the default, you will see the word Select as shown above.
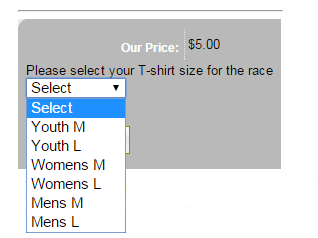
If the word select appears in the Forms reports as a choice, you will then know the customer didn't make any selection. You couldn't be sure of that if Youth M was the first choice in the drop-down menu.
Creating a Product Template with a drop-down menu where a specific amount of items must be selected.
We recently added a Class Selector to Product Templates that forces a customer to choose a selected number of items. The 'Input Type' to select is Class Selector. You can then input all the classes to include in the list. Note the Required # field. This will indicate how many choices the customer must select.
Note: You must input the word Classes in the Name Field for this function to work! Seriously.
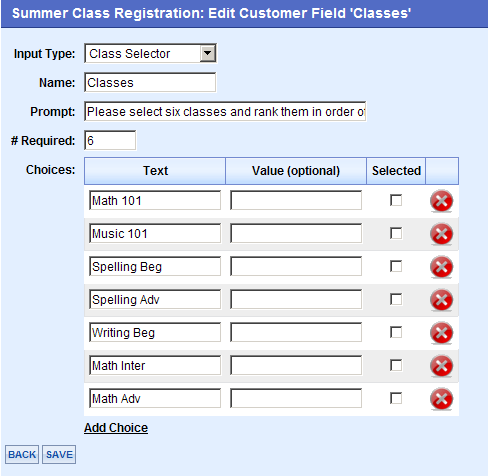
The customer will see the template in the figure below. They click the class to select it and then click the right arrow to include that class as the Math 101 class example shows. It is recommended to have some instructions for the customer in the description field to make it more clear for the customer. A customer must choose the required number of classes before clicking 'Add to Basket'. (In this example, the customer must choose six.)
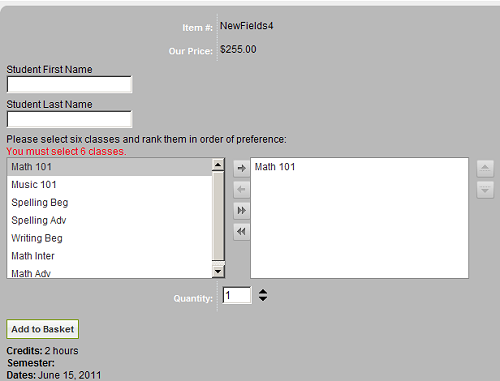
Then the customer is able to add the product to their basket and enroll for the classes selected.
Note: You can't use the word Name or Date as one of your fields. Do NOT change a product template after it has been used. This can cause issues where you might lose your data!
Related Topics:
-
Products - Adding and editing products.
-
Forms Reports - Viewing and manipulating Product Template data in ePayTrak.
2019 © Edutrak Software, LLC